 |
| Every boy cat needs a bow tie. |

Showing posts with label DIY. Show all posts
Showing posts with label DIY. Show all posts
Sunday, April 29, 2012

Wooden Pictures
I recently tried the tutorial I found on Pinterest that shows us how to take a picture printed on computer paper and transfer it to a block of wood. You can find the video of what I'm talking about here.
I started by choosing photos of my children that I really like from the past few years, printing them on regular sized printer paper, and then cutting them out to fit the size of wood I wanted them to fit on.

This stuff right here, this "Gloss Gel Medium" is entirely too expensive for its own good. I had to wander around hobby lobby a while until I found it tucked away in the art supply section, and then when I saw that it was $21.99, I almost freaked. Luckily, you only use a small amount of it for this sort of project, so I have tons more to use later. But seriously, who prices this stuff?
As the video in the link above shows, you coat your piece of wood with this gel medium, and then place your picture face down onto the block of wood, smoothing out the bubbles and whatnot before you leave it to dry overnight. (Oh, and when they say overnight, they really mean overnight. Trust me. I tried.)

Once it has sat overnight, you bring it in and wet the paper until you can see the picture through the back of it. Then very gently wipe away the paper. At least, that's what she shows in the video. I had some problems with this step, problems I didn't get on film because I didn't want to put my yucky hands on my camera. So, here's what I did...
I did wet the entire back of the photo until I could see the print through it. And then I gently started at the corner of the piece of paper and slowly start removing the paper residue. But the ink came with it. So I let the water dry a bit and then started again. It worked better when it was almost completely dry. In fact, when I got to the actual part with my children, the paper was practically completely dry. I pulled out a sink sponge with the scrubby part on the back of it and used it to gently scrap away the paper residue.
Once I felt like all the paper was off, I ran the block of wood with picture under the faucet for a few seconds to wash away any remaining paper residue and then immediately coated it with Mod Podge.
I sat on my mantel to dry and here's how it looked when complete:

I'm not super unhappy with the results, but I'm also not crazy about them either. I'm going to try using a laser jet printer and see what I can do. I'll update that...later.
Oh, I also did one in color. Here's how it turned out:

I started by choosing photos of my children that I really like from the past few years, printing them on regular sized printer paper, and then cutting them out to fit the size of wood I wanted them to fit on.

The first mistake I made was forgetting that Evie's name would show up backwards on the piece of wood. But oh, well. The second mistake I made was printing these pictures with an inkjet printer rather than a laser printer. I still got decent results, but nothing comparable to what you see in that link posted above.
 |
As the video in the link above shows, you coat your piece of wood with this gel medium, and then place your picture face down onto the block of wood, smoothing out the bubbles and whatnot before you leave it to dry overnight. (Oh, and when they say overnight, they really mean overnight. Trust me. I tried.)

Once it has sat overnight, you bring it in and wet the paper until you can see the picture through the back of it. Then very gently wipe away the paper. At least, that's what she shows in the video. I had some problems with this step, problems I didn't get on film because I didn't want to put my yucky hands on my camera. So, here's what I did...
I did wet the entire back of the photo until I could see the print through it. And then I gently started at the corner of the piece of paper and slowly start removing the paper residue. But the ink came with it. So I let the water dry a bit and then started again. It worked better when it was almost completely dry. In fact, when I got to the actual part with my children, the paper was practically completely dry. I pulled out a sink sponge with the scrubby part on the back of it and used it to gently scrap away the paper residue.
Once I felt like all the paper was off, I ran the block of wood with picture under the faucet for a few seconds to wash away any remaining paper residue and then immediately coated it with Mod Podge.
I sat on my mantel to dry and here's how it looked when complete:

Oh, I also did one in color. Here's how it turned out:

Monday, January 2, 2012
The Book Nerd's Jewelry Box
For my birthday last May, my husband gave me a jewelry box. But not just any jewelry box. See, I don't like the typical kind of stuff. I have a less sophisticated taste than say my sister or most grown women I know. My bedroom is an eclectic gathering of mismatched things that make no sense to anyone else but make perfect sense to me.


See? Told you. It's a work in progress. One day, when I have time, that dresser will be red. And the walls that have not been painted will be. And the red phone booth canvas was intended for my office, but then how could I enjoy it?
I realize I have a tackiness problem. Shut up.
So anyway, he bought me a jewelry box. It looked like this when it came home:



See? Told you. It's a work in progress. One day, when I have time, that dresser will be red. And the walls that have not been painted will be. And the red phone booth canvas was intended for my office, but then how could I enjoy it?
I realize I have a tackiness problem. Shut up.
So anyway, he bought me a jewelry box. It looked like this when it came home:
 |
| Sorry for the crappy iPhone pic quality. |
It has sat on my dresser looking like this for months. Well, since May, so that's, what, like 6 or something months? I'm an English teacher. We don't Math.
I couldn't figure out what color I wanted to paint it. I had all these suggestions from friends. Turquoise. Yellow. Mint Green. Red. But I couldn't commit to anything because I wanted it to "match" my room. Until I realized something:
That's impossible.
So, I was walking through Hobby Lobby with my mother the day after Christmas and decided to go check out the acrylic paint. I literally played eeny meeny miney moe with the colors and decided on "Lush Foliage." What a great word, "lush."
And so I painted it.


The handle inserts are card stock of different flying creatures, like birds and insects. There was one on the stock of what looked like a derranged deer, but I thought that would be a bit much.
I'm sure in a few months, I will decide the box needs to be a different color, but for now, I'm happy with it. And it fits nicely in my mismatched room from hell.
I'm sure in a few months, I will decide the box needs to be a different color, but for now, I'm happy with it. And it fits nicely in my mismatched room from hell.
Thursday, December 29, 2011
The Kitchen Curtains
This past summer, I lucked up and found ten yards of vintage fabric for ten bucks. I didn't know what I was going to do with it, only that I liked it and that I knew I'd find something useful for it one day. Then, halfway through the Fall semester, I realized just what to do: make curtains for my kitchen.
Now, I should explain a few things about my kitchen. When we moved into this house, I hated it (the kitchen). The cabinets are horrible. The counter tops are made of that old laminate stuff. The appliances (specifically the dishwasher) look like something out of 1973. Oh, and the washer and dryer are in the corner, which somehow makes it impossible for an actual kitchen table to be in the room--even a small bistro style table. Needless to say, I was unhappy because I LOVE a good kitchen. A good kitchen is easily my favorite room in the house.
But my kitchen was not good. And I knew we couldn't afford the money or time it would take to give it a modern update.
Then, one day, while visiting with my Gran, I realized something. Her kitchen is my most favorite room that exists on this planet. And her kitchen is old school. Just like mine. But hers has character because she has given it the character it needs.
And so I started to work my magic. Slowly. Piece by piece. Today, another piece fell in place. I made and hung three basic, old school curtains that look divine in my now "happy place" kitchen.


Now, I should explain a few things about my kitchen. When we moved into this house, I hated it (the kitchen). The cabinets are horrible. The counter tops are made of that old laminate stuff. The appliances (specifically the dishwasher) look like something out of 1973. Oh, and the washer and dryer are in the corner, which somehow makes it impossible for an actual kitchen table to be in the room--even a small bistro style table. Needless to say, I was unhappy because I LOVE a good kitchen. A good kitchen is easily my favorite room in the house.
But my kitchen was not good. And I knew we couldn't afford the money or time it would take to give it a modern update.
Then, one day, while visiting with my Gran, I realized something. Her kitchen is my most favorite room that exists on this planet. And her kitchen is old school. Just like mine. But hers has character because she has given it the character it needs.
And so I started to work my magic. Slowly. Piece by piece. Today, another piece fell in place. I made and hung three basic, old school curtains that look divine in my now "happy place" kitchen.
 |
 |


I think...think...all that's left to do now is find the right rug for the room, which I'm fairly sure will need to be a large, braided, red rug. Oh, and to make some hand towels. And replace the cabinet hardware.
A little at a time...
Saturday, December 3, 2011
Deck the Halls
May your Christmas Decorating be joyous and awesome.
 |
| Mantel Garland with Real Magnolia Leaves |
 |
| Ribbons and Real Holly Leaves and Berries |
 |
| Santa Pepper |
 |
| Shrek and the Who hat |
 |
| The Girl Bell |
 |
| Vader helps us decorate. |
Sunday, November 20, 2011
Tinting Jars
My Gran has some of those official 1930s blue tinted mason jars. The ones that are awesome and gorgeous and worth some money is they have the original top and stuff with them. I've always loved those blue jars, so when I came across the tutorial to tint mason jars, I knew I had to try it. Luckily, my sister also came across the same tutorial, so we decided to give it a shot together this weekend. We played around with colors and jar sizes and such until we were finally satisfied. Of course, I completely forgot to take photos of the jars we were happiest with, mostly because I was exhausted and went to bed before they were done cooling. She had them all packed up by the time I woke up this morning. But the pictures below provide a pretty decent visual, so we'll go with them.
What You'll Need:
 |
| Orange tinted jar just out of the oven. |
What You'll Need:
- Clean, dry mason jars (any size will do)
- A bottle of Mod Podge (the glossy kind)
- Water
- Food Coloring
- Wax Paper
- Cooling Racks
- Baking Sheets
- A Plastic Throw Away Solo Cup
- A Plastic Spoon
The last two don't have to be plastic because you can wash this stuff out, but I find using plastic makes the clean up easier. I realize it's not great for the environment, though.
 |
| Mod Podge can be found at any craft supply store. |
What You Need to Do:
- Preheat the oven at 270°
- Put a sheet of wax paper in your baking sheet, and then set a cooling rack on the wax paper
- In the plastic cup, pour 4 tablespoons of Mod Podge, 1 tablespoon of water, and roughly 8-10 drops of the food coloring of your choice. Stir well.
- Pour enough of the mixture into the bottom of your mason jars so that you are able to roll it around in the jars and coat the jars inside completely
- Pour any excess mixture back into the plastic cup
- Set the mason jars upside down on the cooling rack that is sitting in your baking sheet
- Let the mason jars sit for roughly 30 minutes (they will start to dry during this time.)
- Put the baking sheet with the mason jars upside down in the oven and bake for 30 minutes
- Flip the mason jars right side up and let them bake another 30 minutes
- Remove and allow them to cool completely before handling
WARNING: You cannot eat or drink out of these jars. They are toxic. You can, however, use them as votive holders, flower vases, or storage jars.
 |
| Jars drying before baking. |
 |
| Baking Jars |
Now, I know that the above jars don't look perfect. They don't have to. But, to take care of streaks or if you find your rims glopping up too much (which we found with the first batch which is pictured above), you can put more water in your mixture and/or bake a little longer. These things will take care of the glops and the streaks.
I'm thinking of making green and red ones for the Christmas Season and putting them all over the place with my normal decorations.
Now, go forth and tint!
Thursday, June 2, 2011
It really is the easiest skirt ever.
I've been following MADE for a while now, mostly because looking at pretty stuff makes me happy. She has this tutorial that she claims is "a simple skirt." Yeah. Normally, I don't buy that kind of thing at all. People who have mad skills often times say stuff is "simple" or "easy" because for them it is. But I've been looking at the tutorial and thinking, "You know, it really does look kind of simple."
So, today was the day. The day that I finally broke away from making things for the home and instead made something for one of my girls. And guess what? It really is simple!


So, today was the day. The day that I finally broke away from making things for the home and instead made something for one of my girls. And guess what? It really is simple!
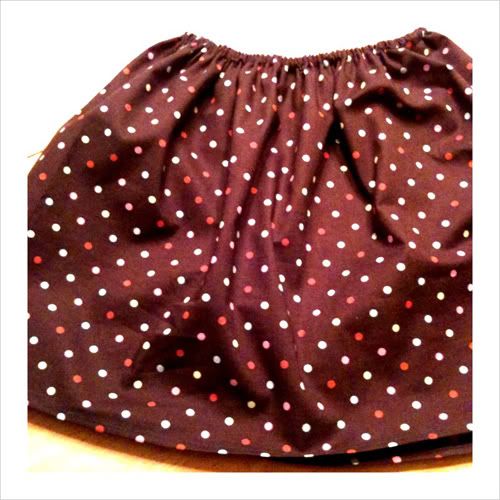
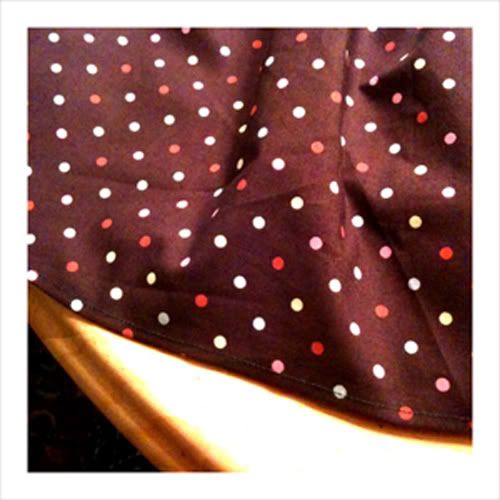
(Please excuse the wrinkles. I have not ironed it yet.)
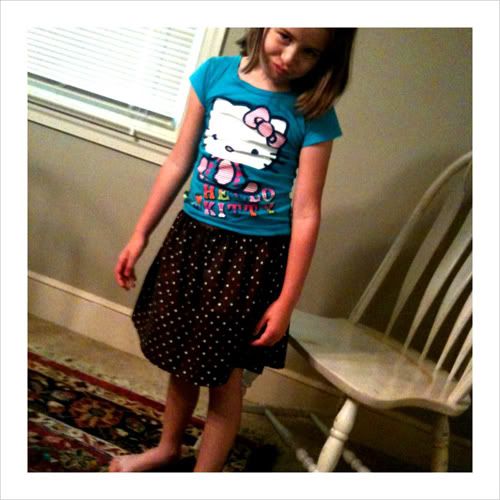
Evie is pretty unhappy being a model, so this is the best shot I could get with the skirt on. I'm really, REALLY happy with the way this turned out. I foresee a trip to the discount fabric store in my immediate future and a bunch of play skirts for the summer for my children.
Tuesday, May 31, 2011
The "Vintage" Fabric Flower
My mom and I went hat shopping the other day. For her. Not for me, although I really want a fabulous hat. Thank you Royal Wedding for that itch.


While we were out and about, I kept coming across those vintage fabric flowers. You know, the ones made with chiffon and tulle. They're beautiful and elegant and EXPENSIVE when store bought. So I came home and figured out how to make one for less than $4. And that's pretty awesome, if I do say so myself.
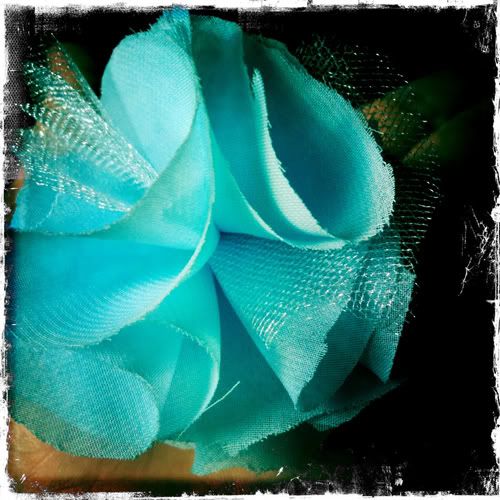
Here's what you will need:
- 1 yard of chiffon (a color of your choosing)
- 1 yard of tulle (in roughly the same shade as the chiffon)
- Needle and Thread
- Clasp of your choice (I sewed this one to a ponytail band for one of my daughters, but I'm also going to sew a few to pin backs)
A yard of each of these fabrics will make multiple flowers, depending on how big you want your flowers. For this one, I literally put a roll of masking tape down on the fabric, traced the inside circle with a pencil, and cut my flower "petals" out. This size is perfect children. I am also going to go bigger so I can create a hair clip for me. I'll try to remember to post an updated photo of that when I complete it.
First, you will need to cut your "petals" out. They do not have to be perfect circles, and they do not have to be all the same size. The flower pictured above had 9 chiffon petals and 5 tulle petals.
Starting with a chiffon petal, fold your circle in half:
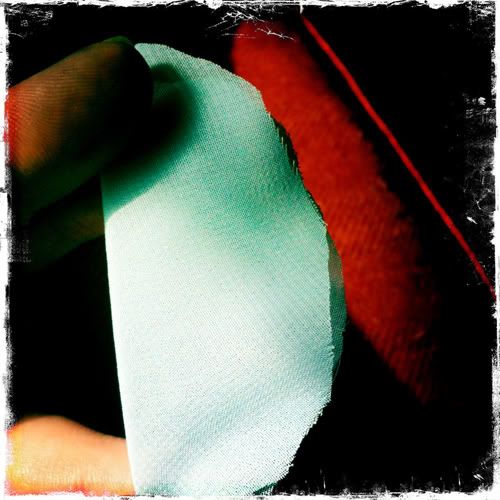
And then fold it in half again:
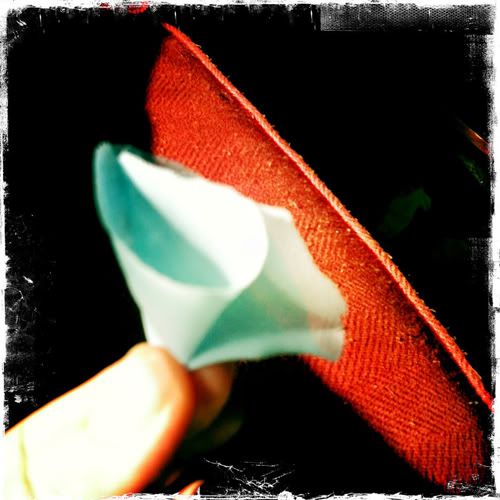
Then, with your needle and thread, sew through the tip of the triangle and back again:

From here on, you just add your petals one after another, sewing them together in a circular pattern that overlaps itself. Make sure you alternate between chiffon and tulle so your flower will have some sturdiness and poofiness to it. Once you have all of your petals sewn together, tie your thread off with a double knot. At this point, I also added a circular piece of tulle to the back of my flower, leaving it unfolded, so it could serve as a kind of backer. I found having it there made it easier to sew the ponytail holder to the flower because it kept the flower petals from getting in my way and blocking my view.
My daughter loved it and had to have it put in her hair immediately.

So cute and cheap!
Subscribe to:
Posts (Atom)